
Welcome to the ultimate guide to completing the Lost in Transit heist on One Down in full stealth. After needing help identifying particular objects and locations in the mission, I created this guide. Rather than wasting time watching random videos, I compiled everything into one easy-to-follow resource with pictures.
This guide includes:
- Detailed step-by-step walkthrough of all mission objectives.
- Exact spawn points for key items and objectives.
- Pro tips on avoiding detection and recommended stealth routes.
- Strategic advice on creating favorable situations for yourself and your crew.
- Alternative paths and ways to skip tricky objectives.
Heist Overview
Here’s a quick rundown of the mission objectives (sourced from the Payday fandom wiki):
- Enter the security checkpoint
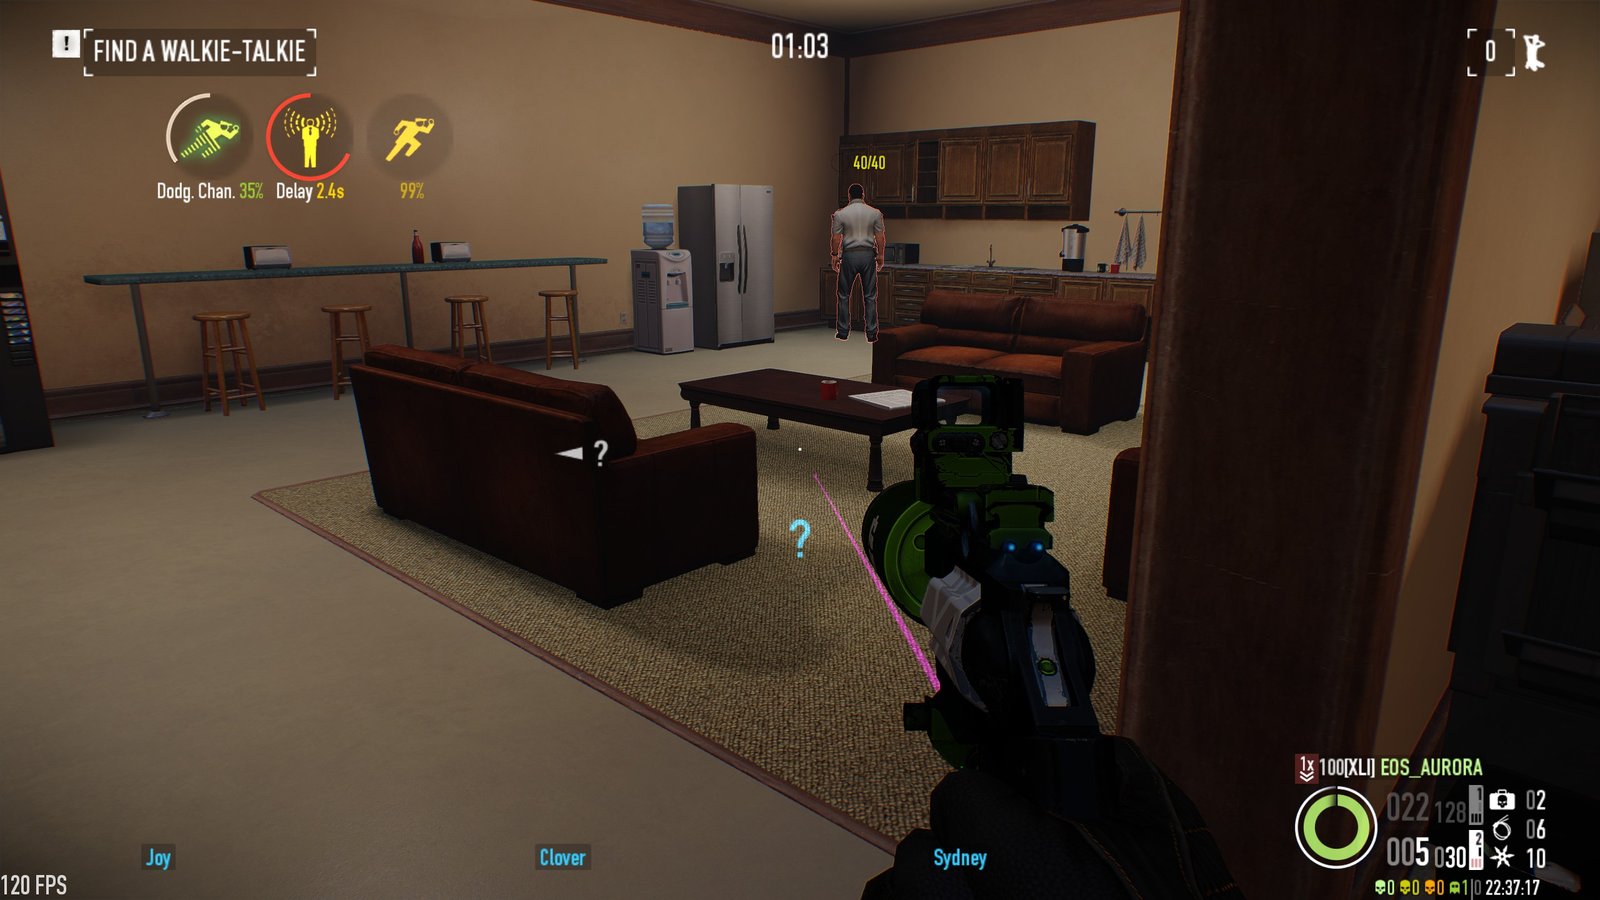
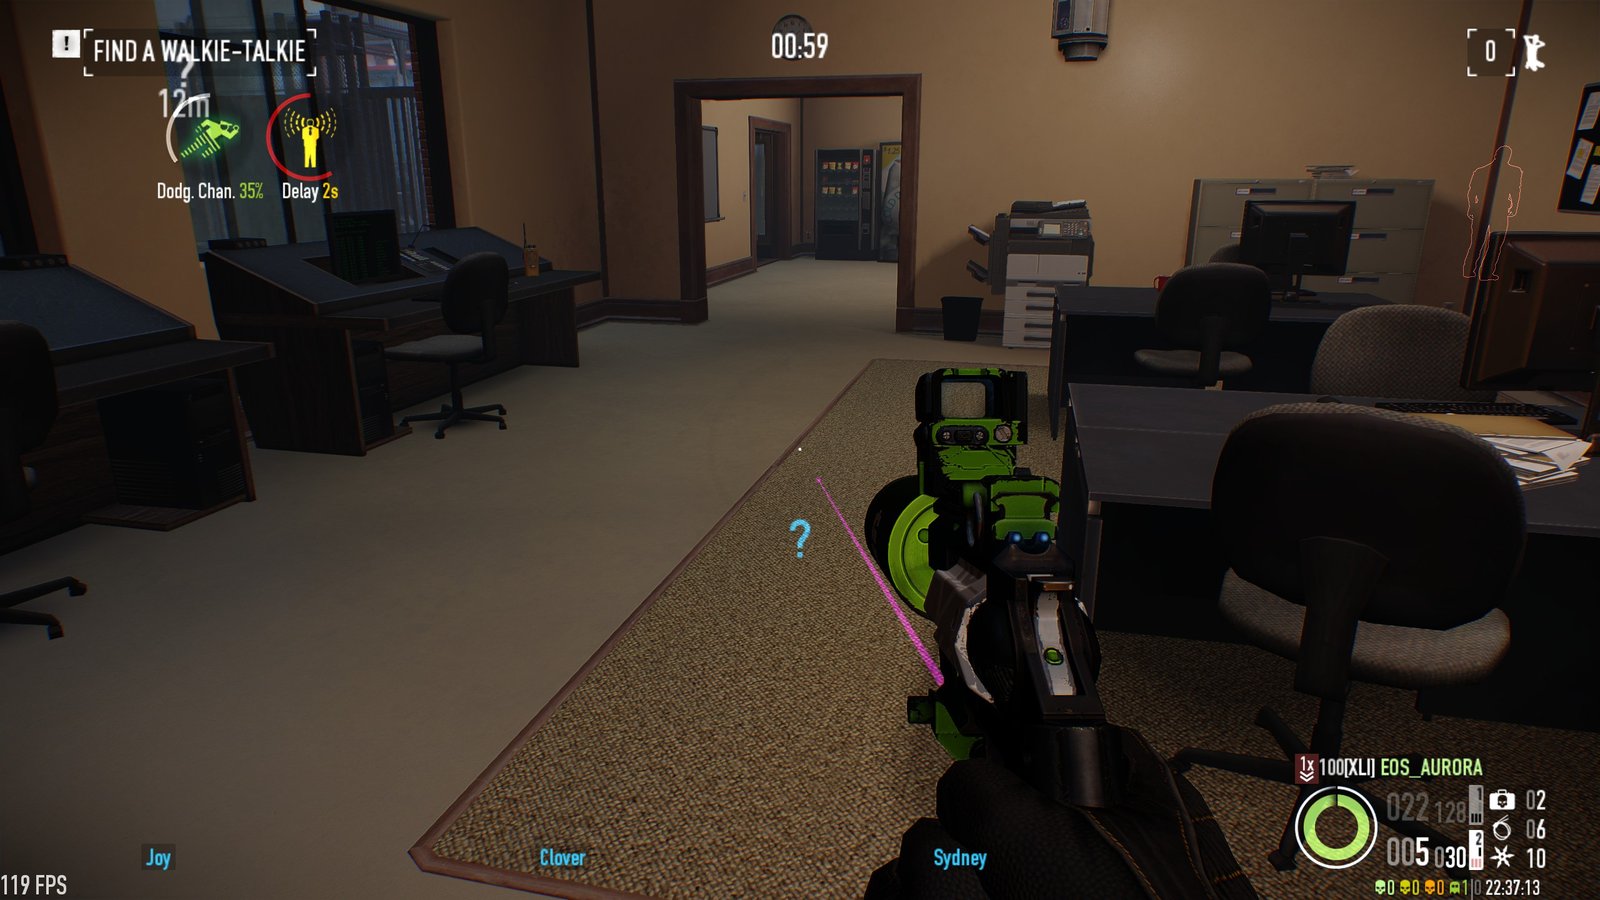
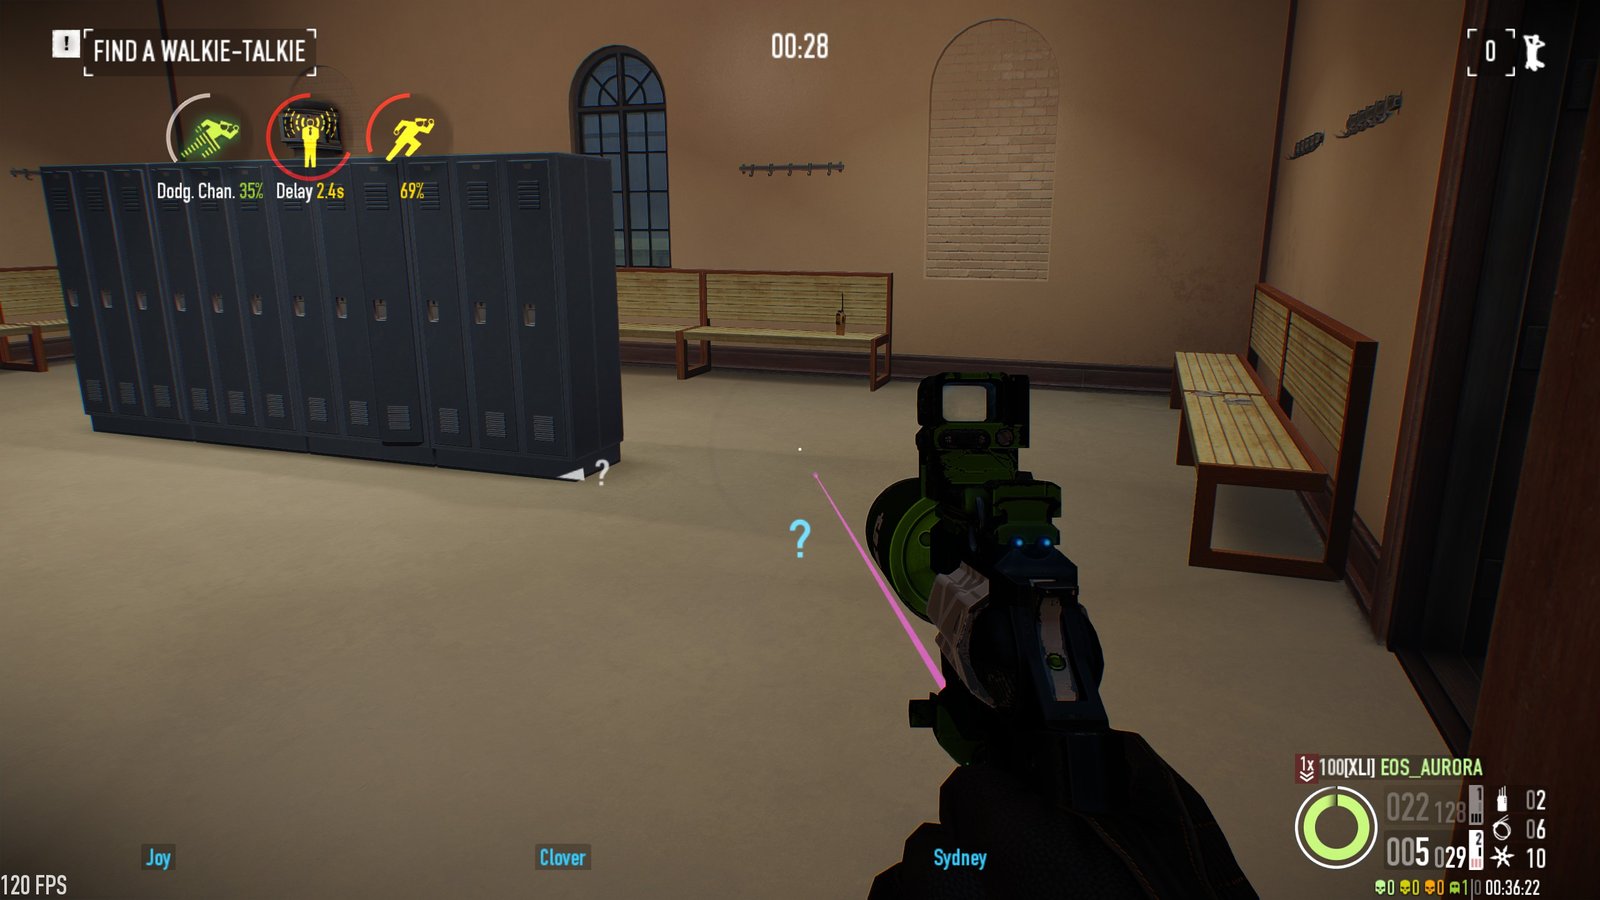
- Find the Walkie-Talkie
- Enter the warehouse
- Access the admin office (using a code or drill)
- Hack the shipping manifest
- Locate the motion sensor console
- Find and hack the keygen console
- Disable the motion sensor
- Identify the correct wagon (Only specific wagons can open RFID boxes!)
- Collect the blowtorch (after entering the admin office)
- Break into wagons and secure the plates (6 OK-, 9 Mayhem+)
- Access the PA system
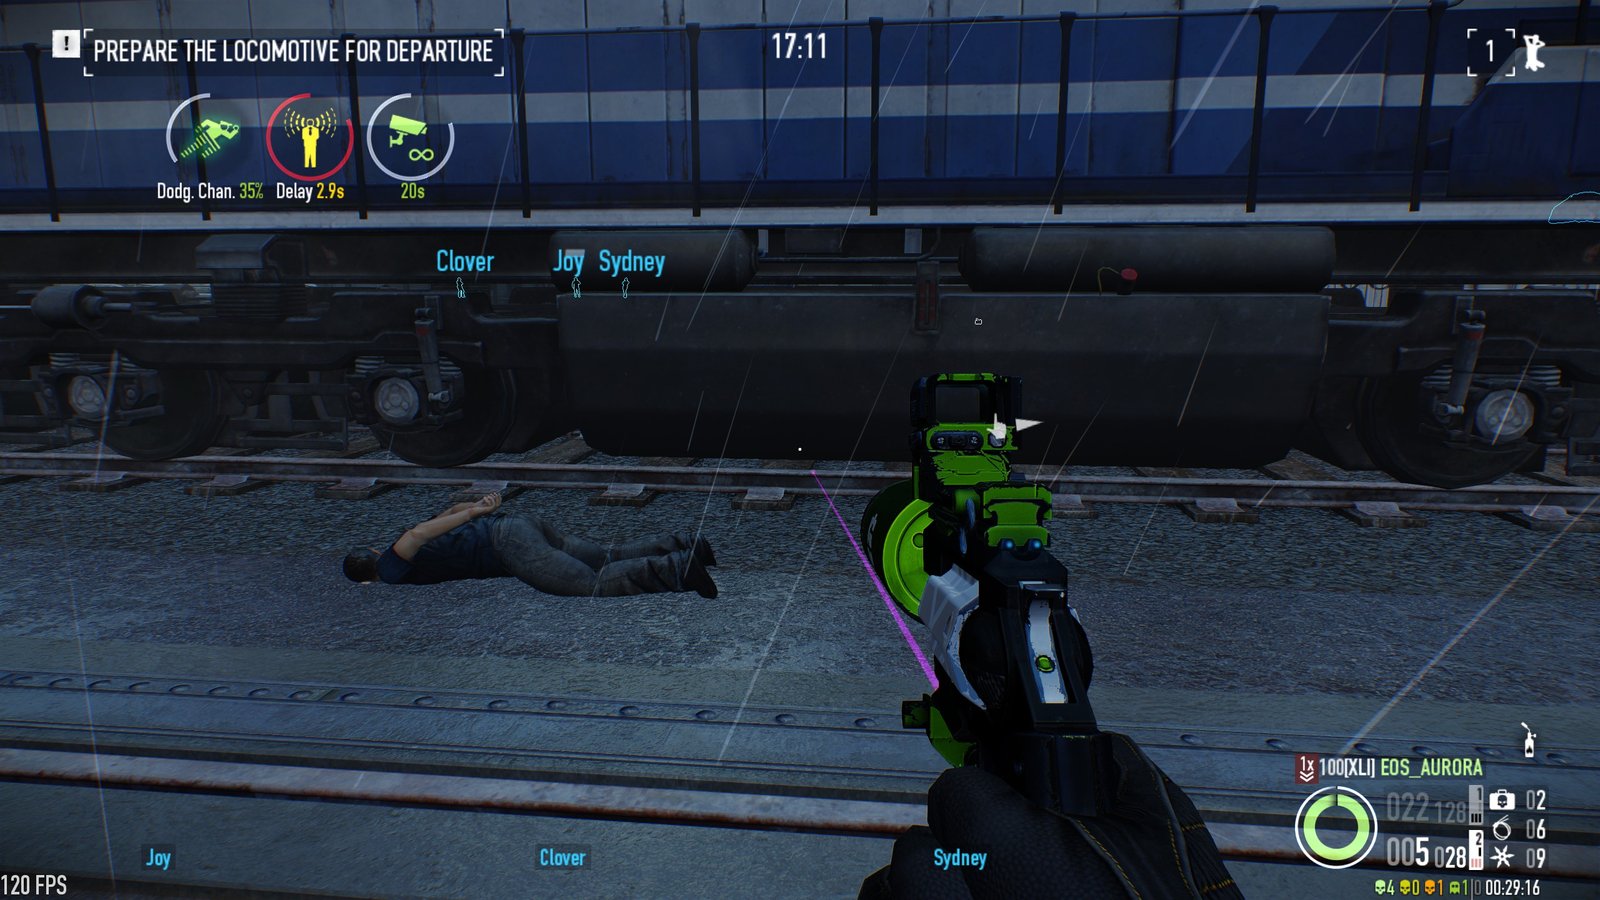
- Prepare the locomotive for departure
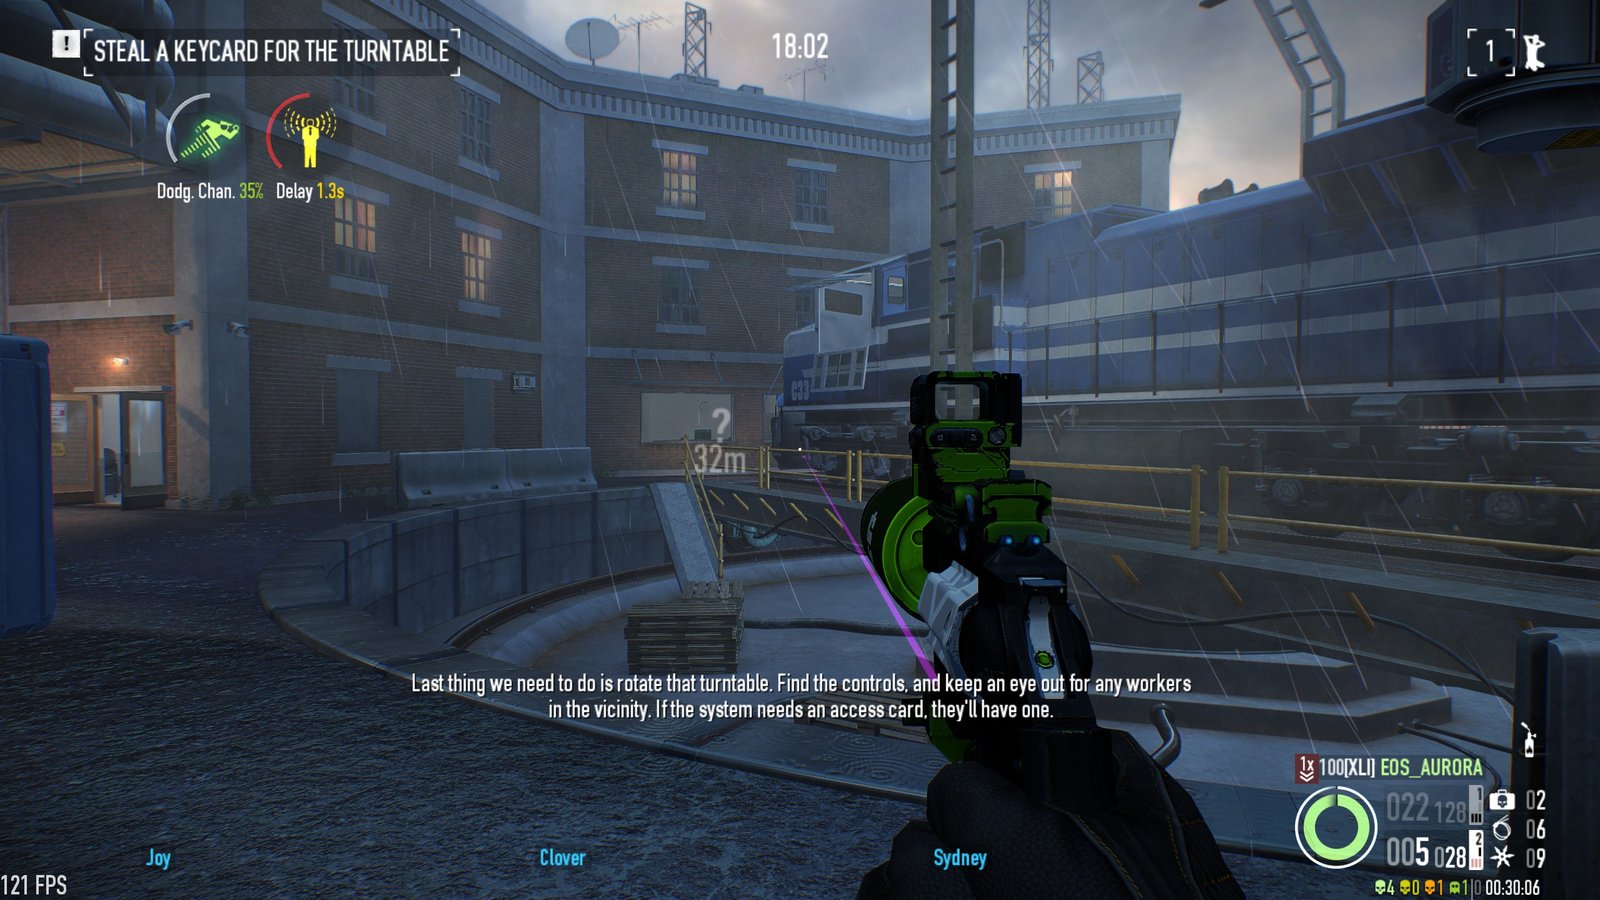
- Find the keycard (after passing the second gate)
- Rotate the turntable
- Repair the power cables (not guaranteed on lower difficulties)
- Escape!
General Tips
Map-Wide Info
- No Camera Room: Cameras are always on the lookout, so be vigilant. On Mayhem+, expect Titan cameras that are especially sneaky.
- Drones Are a Threat: Watch for drones moving around randomly. Drones can spot you if you’re on top of a train or leaving bodies in the open. You can reduce their frequency via pre-planning!
- Guard Routes: Guards usually follow predictable paths within a specific train aisle. Use this to your advantage to time movements and avoid detection.
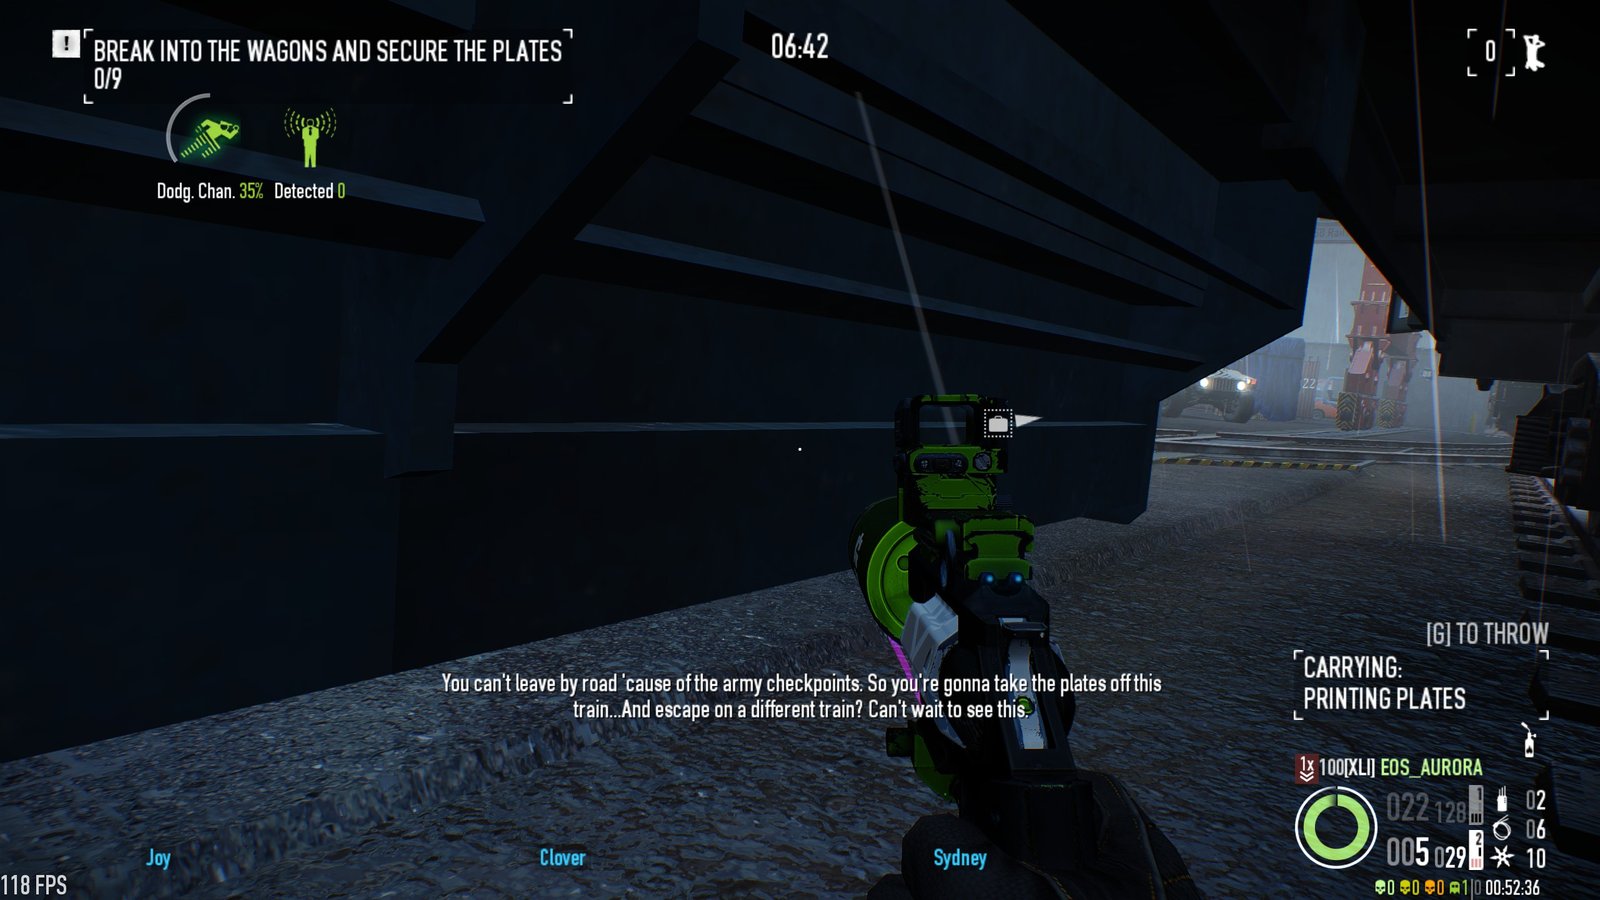
- Hiding: The openable train wagons are your best friends. You can hide under the stairs of these wagons for perfect cover! (Though, the bag hiding here is still untested).
![]()
- Extra Hiding Spaces: Some non-objective wagons are ideal for stashing loot or yourself. They’re also a treasure chest of cash—3 bags per wagon.
Movement Info
- Navigating Tight Spaces: Despite the map’s narrow layout, plenty of hidden paths exist between train wagons. Watch out for low-construction materials or underground tunnels for quick escapes.
- Climbing to Victory: Need to get on top of a train? Look for construction materials stacked on flatbed wagons or climb the ladder to the warehouse’s second floor. Bonus: Scaffolding allows you to leap between trains—if you have the right skills, you can jump directly over the aisles.
- Parkour Mastery: If you’re a daring thief, you can hop over the aisles between trains. Just make sure your timing is perfect, or you’ll fall short!
Looting 101
Once you have the blowtorch, the fun begins. Blowtorch specific wagons and watch pre-bagged money bags fall into place! Remember, when the bags drop, guards will notice if they’re nearby. Stash the loot fast or deal with any guards wandering too close.
- Loot Breakdown: There are 35 bags of loot on DS difficulty:
- 18 bags in non-objective wagons (3 bags per wagon, 6 wagons).
- 8 bags in blowtorchable wagons over tunnels (2 bags per wagon, 4 wagons).
- If you’re lucky, you can secure the loot train early in the mission. It’s a perfect place to stash loot safely before diving into the tougher objectives!
Pre-Planning for Maximum Stealth
![]()
![]()
![]()
While the pre-planning phase for Lost in Transit is fairly standard, here are some unique options to help you get the edge:
- Ladder: Place it strategically on the East or West side of the map for easy access to the tops of train wagons or the warehouse. It’s a lifesaver when you need a quick escape!
- Less Drones: Drones are a nightmare—get fewer drones for better stealth control.
- Extra Blowtorch: A blowtorch is handy if you have a whole crew and need to open wagons quickly. Otherwise, it’s not worth the extra loadout.
- Extra Dumpsters: Don’t bother with this one. There are plenty of train wagons and cargo containers to stash your loot.
Stepping Foot on the Property
Map of Interest
Here’s where you’ll find key locations and entry points to the map:
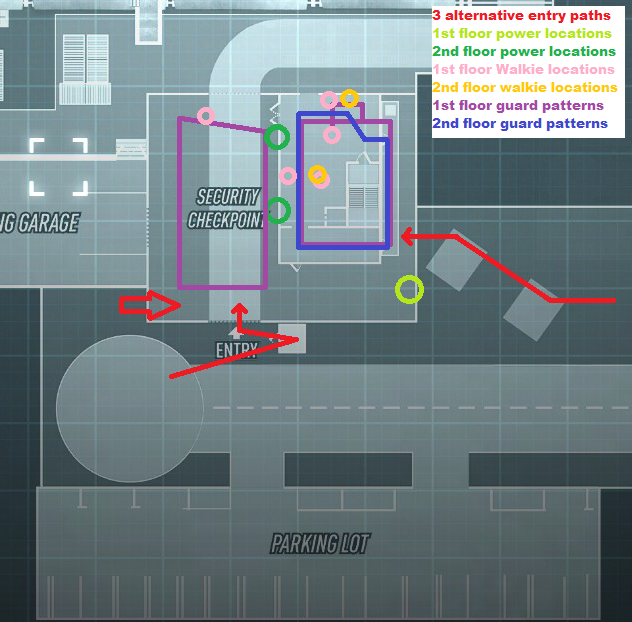
There are three primary ways to enter the train yard:
- Front Gate: This is the most direct route, but be cautious of guards. You can either kill a guard or sneak up when he’s outside. Pro tip: Position yourself on the right side of the gate—this lets you slip in smoothly.
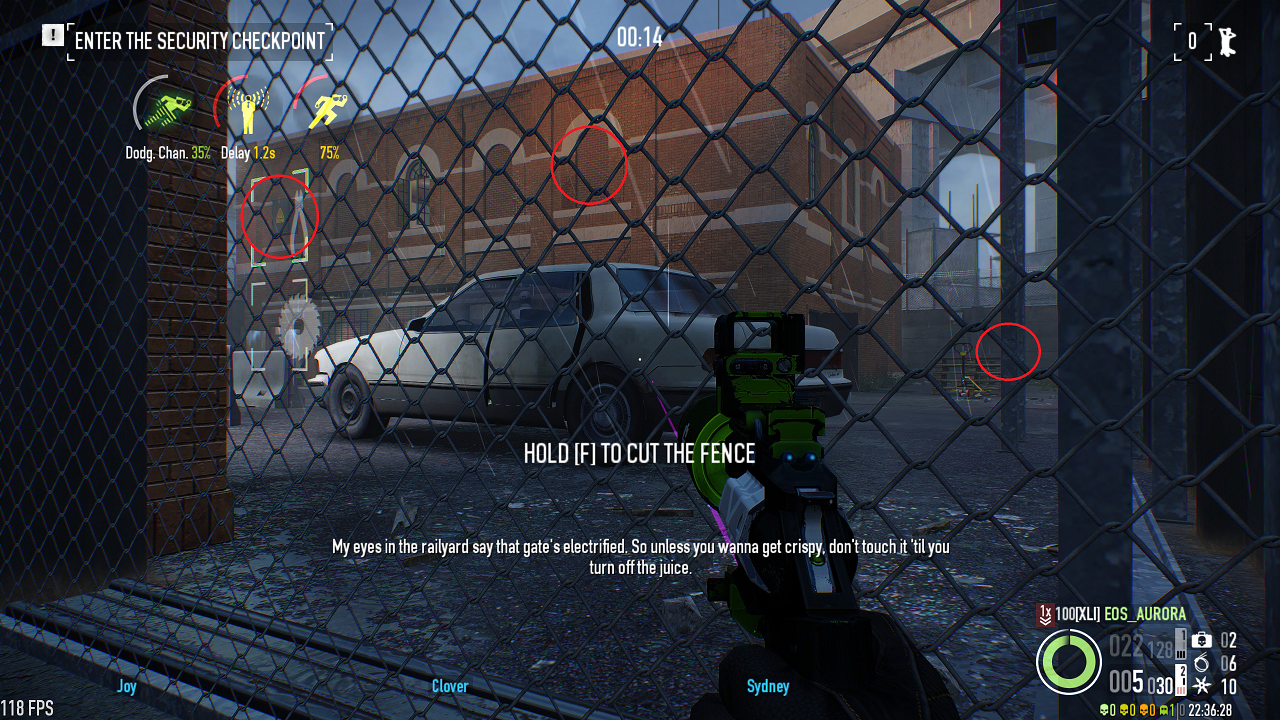
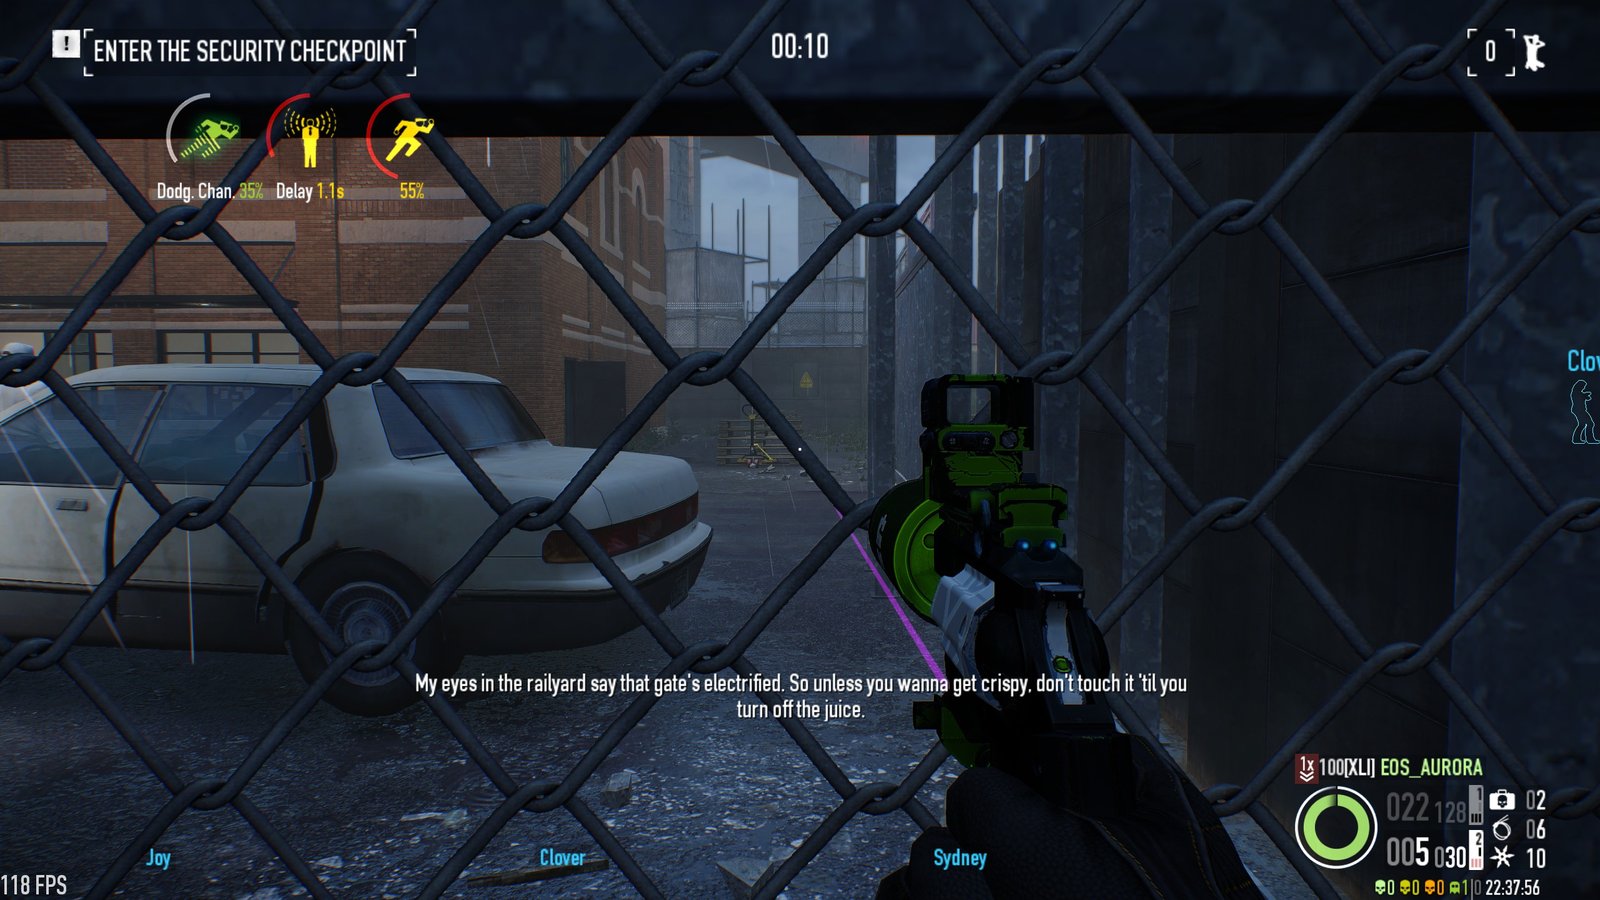
- Cutting the Fence: Easiest way. Just shoot the power box and cut through the fence.
- Parkour Over: Use the scaffolding to jump over the fence to the second floor. Be mindful of the drop, as falling will bring you down.
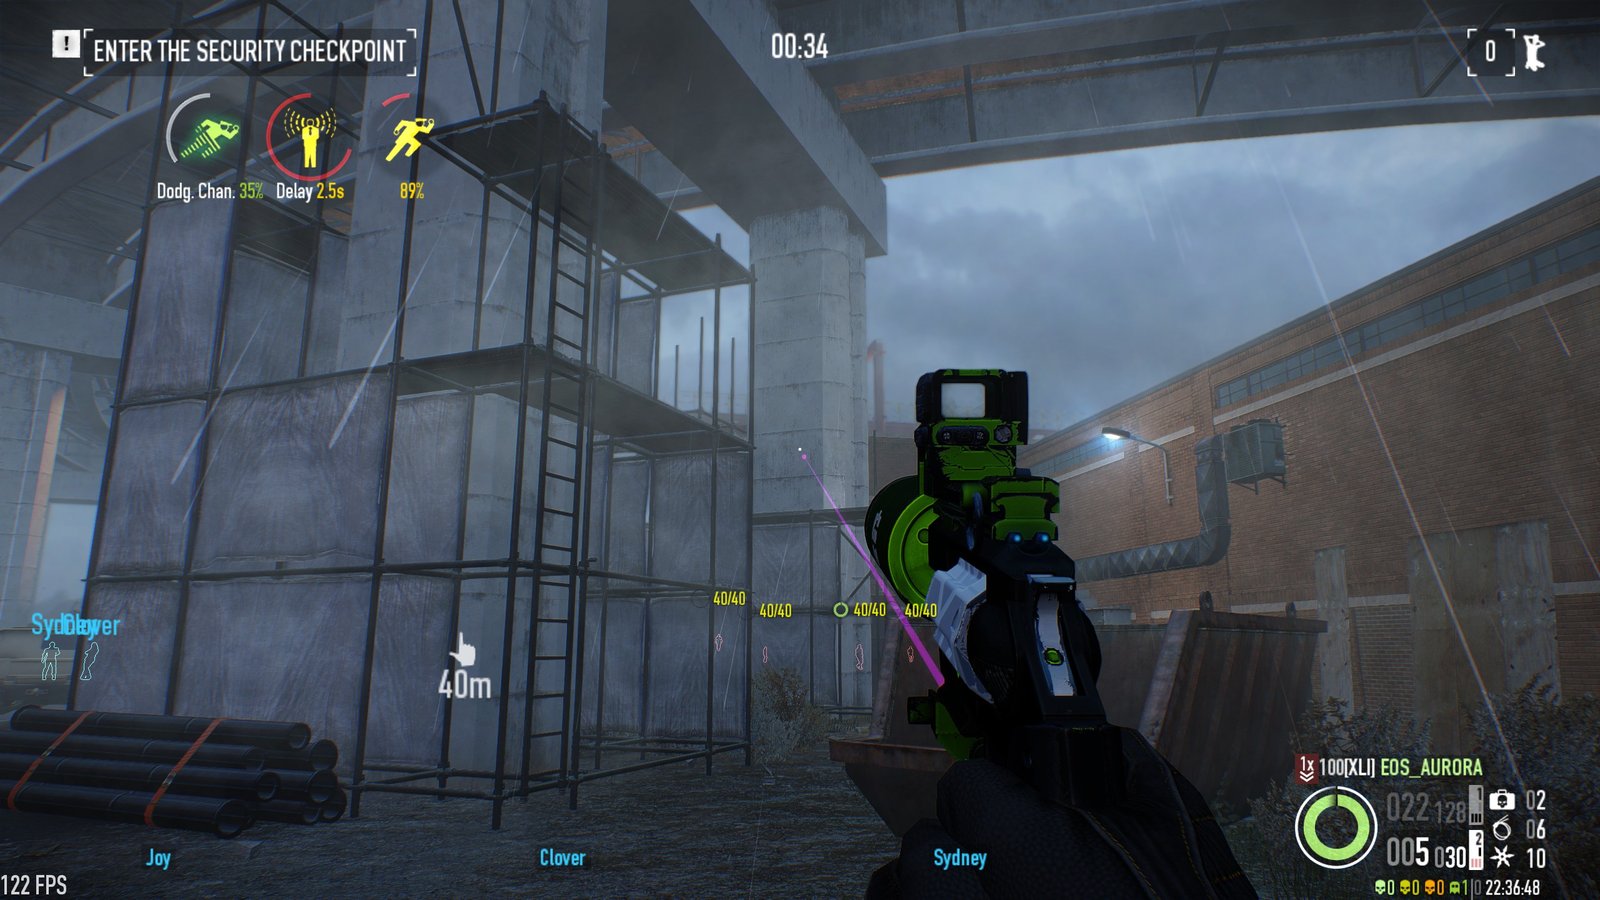
Opening the Gate
- Walkie-Talkie: To stay stealthy, use the walkie-talkie to communicate with the guard. The gate will open in a few seconds, so hang tight. Pro tip: Use the right side of the gate to slip in without drawing attention.
Also Read: Payday 3 Alternatives
Guard Info
There are three key guards in the starting area. Keep your cool and avoid the temptation to use pagers:
- Street Guard: Moves in a square path. Use cover to stay out of sight, or duck into the alley if needed.
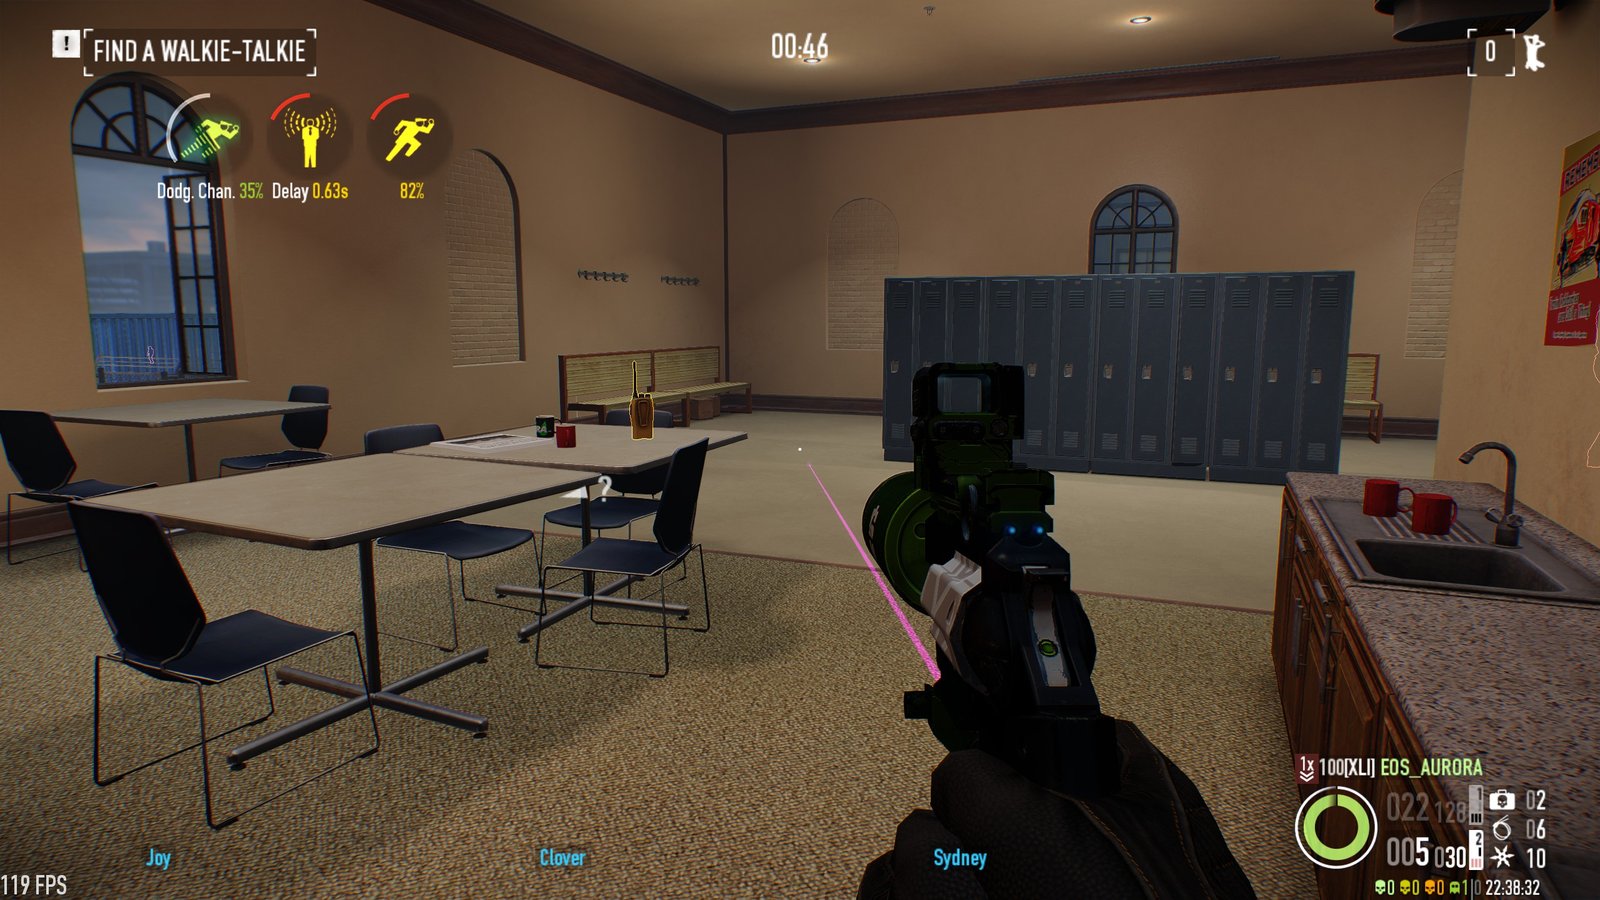
- Break Room Guard: He likes to chill by the coffee table or kitchen area. This is an excellent opportunity to grab the walkie-talkie without him noticing.
- Second Floor Guard: Patrols the locker room and balcony. Watch out because he can spot you if you’re not careful.
Area Layout
The stairs to the second floor are located in the break room, directly to the left when you enter from the alley. Even if the first-floor guard is in the break room, you can quickly sprint behind his back to reach the second floor without alerting him. This makes the break room a convenient access point.
Once on the second floor, an open window leads to an awning outside. However, be cautious when jumping out of this window, as the outside guard can see through it. If you’re not careful with your timing, you might be spotted.
Walkie-Talkie Locations
Here are the locations of walkie-talkies around the map:
- First Floor, Break Room:
- On the bar seating counter
- On the coffee table
- First Floor, Control Room:
- On the control panel
- On the table near the control panel
- Second Floor, Locker Room:
- On the bench by the window
- On the table in the middle of the kitchen area
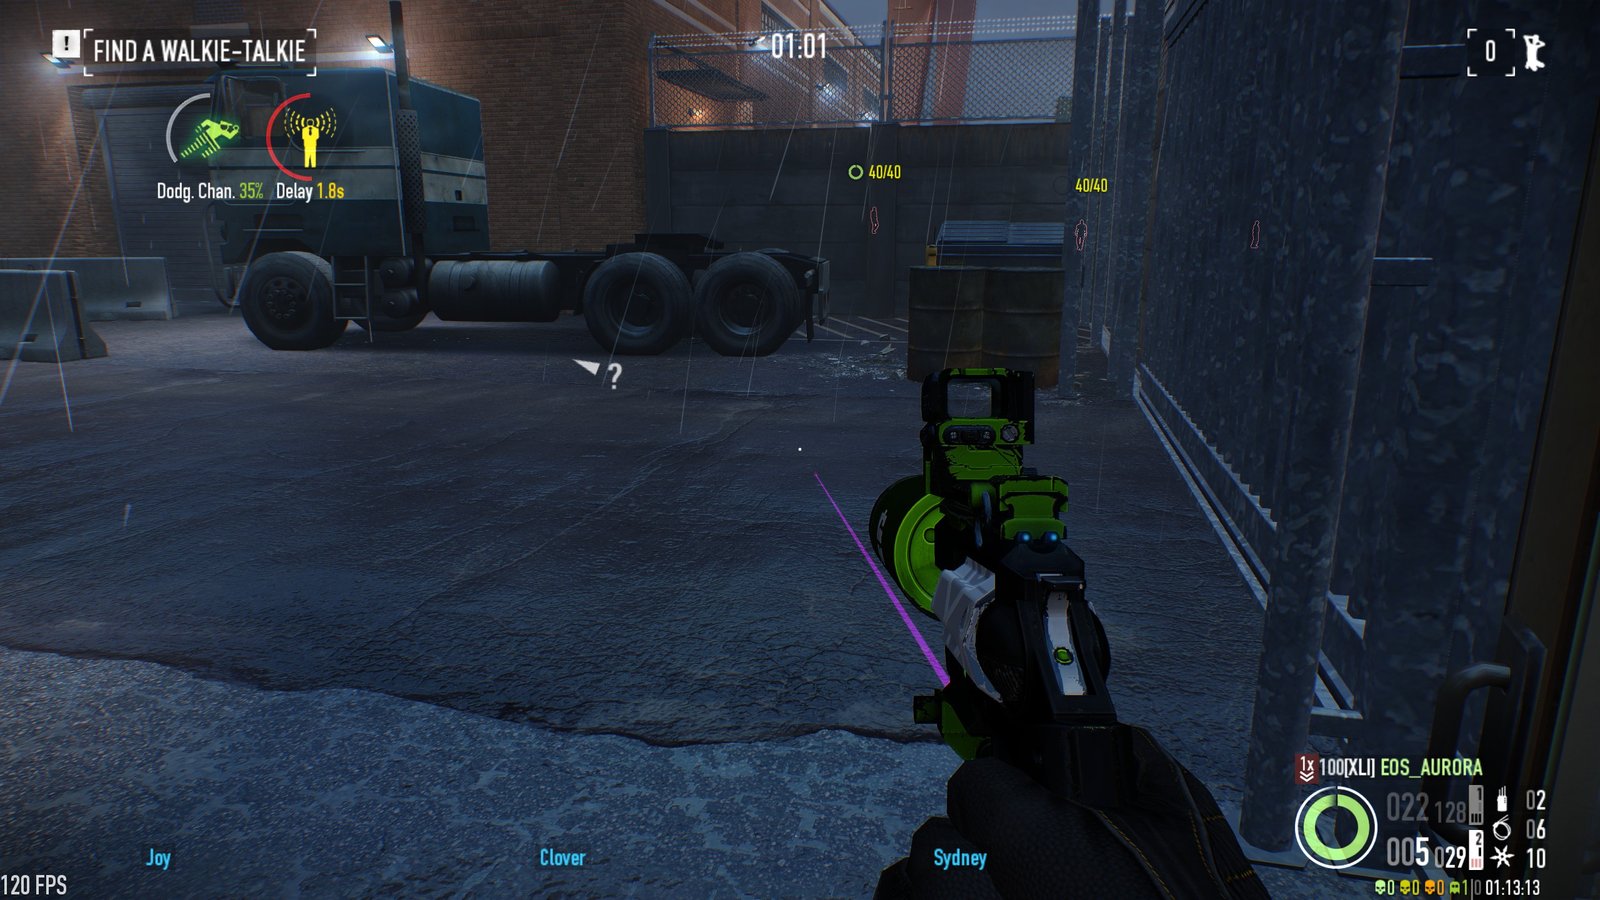
- Outside:
- On the barrel right next to the gate
These walkie-talkies are essential for managing communications, and you should be aware of their locations when planning your moves.
Entering the Trainyard and Warehouse
Map of Interest
Here is the general location of all the essential stuff in this area.
Getting to the Warehouse Area
Once in the trainyard, you’ll encounter more guards patrolling the area. The warehouse will be directly in front of you, but there are two possible routes to reach it:
- Direct Path: Walk between the train wagons straight into the warehouse. Please remember the two guards walking between the gate and the warehouse. This route is faster but requires careful timing to avoid detection.
- Safer Route (Slower): Take a longer path around the trains to the right, which typically avoids guards. However, occasionally, a guard may be near the humvee or forklift. This path is safer but slower.
If you go left, you might encounter a civilian near the gate. You can sprint past them, but be cautious. The benefit of going left is using the warehouse’s outside staircase to avoid the warehouse guards. However, this route takes longer and involves hopping between train connectors.
Inside the Warehouse
Once inside, the admin office is located on the second floor at the far side of the warehouse. Two doors can be opened, and you can enter through one of the following methods:
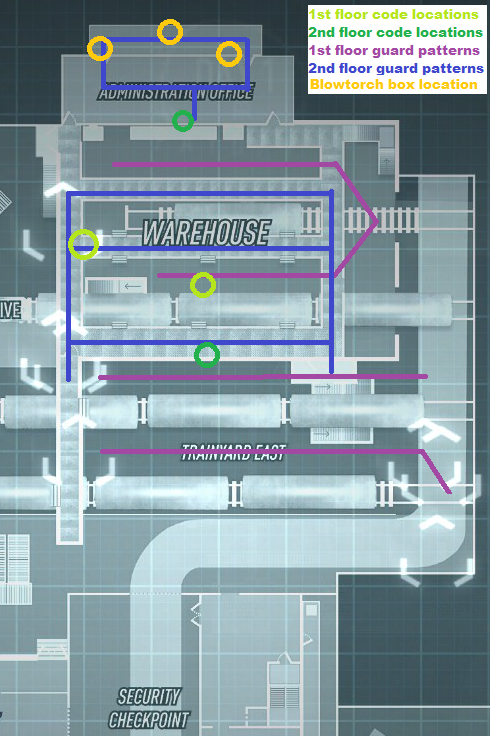
1. Finding the Code
To open the doors, you’ll need to find a code, which can be located in one of these four places:
- Inside the Admin Office: You can see the code through the window, but be cautious of the guard inside. This is the default method, though it can be risky on higher difficulties.
- Second Floor (Opposite Side): The code can be found on a shelf.
- First Floor (Between Catwalks): The code is on top of boxes between the catwalks.
- First Floor (Opposite the Stairs): The code is on a double shelf.

Once you have the code, go to the keypad on either door and input the code. Be careful with the keypad, as inputting the wrong code and triggering the alarm is easy.
2. Drilling the Door
You can drill the doors like regular security doors, but this method is risky. Drilling makes noise, and a guard on the catwalk may hear it. If you decide to drill, ensure you are prepared to handle the guard’s pager. Avoiding this method unless you’re confident in your timing is better.
3. Using the OVE9000 Saw
If you have a saw with a silent motor, you can use it to open the door quietly. Important: Before seeing, could you make sure the guard inside the office is at the opposite end of the room? The small room size means the saw can be heard easily if the guard is nearby. Could you also be sure other guards are far away to avoid detection?
General Tips
- Upon entering the warehouse, it’s often best to head straight for the stairs, no matter which method you use to open the doors.
- If you are looking for the code, check the spawn locations on the second floor first. This is typically the safest way to get the code.
- Remember, each door can only be opened individually. Opening one does not unlock the other, but the second door can be opened from the inside with a quick interaction.
Admin Office Objectives
Hacking the Manifest:
- The computer to hack has two monitors stacked together. Once hacked (~15 seconds), it reveals the train containing the plates. Be within 5 meters for the hack to register as complete.
Getting the Blowtorch(es):
- Look for a blowtorch inside one of the grey lockpick boxes in the back room. The blowtorch is only usable by the person who picks it up. If in a group, there will be 2 blowtorches with an extra available for purchase during pre-planning.
Guard Information
There are five guards in the area:
- The first guard patrols near the front gate.
- The second guard patrols outside the warehouse, occasionally entering it.
- The third guard is inside the warehouse on the first floor, patrolling near the furthest train.
- The fourth guard is on the second floor, patrolling catwalks but avoiding the admin office.
- The fifth guard patrols the admin office and can be tricky to avoid as he peeks out of windows.
Certainly! Here’s a modified version of the article, with some minor improvements to clarity, structure, and flow:
Pager Management Notes:
These guards can be easily eliminated or dominated safely, but there are several factors to consider for each guard to minimize risk:
- First and Second Guards: Avoid using a pager on the first or second guard unless necessary. If the objective train wagons are on this side, please eliminate them for convenience. However, it’s better to handle them cautiously.
- Third Guard: This guard can be hidden in a corner of the warehouse away from the fourth guard’s line of sight, but it’s tricky. If you cannot hide the body properly, you may also need to eliminate the fourth guard. Eliminating the fourth guard gives you access to the warehouse’s first floor, allowing you to move bags out the back door instead of passing by the first two guards.
- Fourth Guard: Be careful not to anger this guard when he is outside, as numerous sightlines from both the ground and drones can cause trouble when answering his pager. Don’t answer his pager near a camera or window—drones can see through them! Also, avoid engaging him near the admin office window, as the fifth guard may spot you.
- Fifth Guard: There’s no need to waste a pager on the fifth guard, as he’s usually easy to avoid. However, if you alert him, dominating him should be relatively safe, though avoid doing so near the camera inside the admin office.
Area Layout
The trainyard is divided into several distinct zones:
- Outside the warehouse: Two trains are situated between the gate and the warehouse, and two more inside the warehouse.
- Warehouse layout: Large doors open to the south and east sides, while the northwest has a backdoor entrance. The warehouse includes two stairwells: one on the inside, near the east side, and another on the outside, near the west.
- Catwalks: A balcony on the southeast side and an extended catwalk on the southwest. These catwalks can be used to jump onto the train roofs for better positioning.
Finding the Motion Sensor Control Box
The most challenging part of this job is locating and disabling the motion sensor control box. Once the motion sensor is disabled, you can proceed with the rest of the heist. You must interact with the motion sensor control to continue the heist.
Motion Sensor Control Box Locations
Here are the possible locations for the motion sensor control box:
- Westernmost side: By the pillar between the trains
- Northwesternmost side: By the pillar near the turntable
- Near the loot train: Inside the container right by it
- Flatbed wagon south of loot train: Next to a blue tarp-covered box
- South warehouse entrance: Just outside the doors (between the doors)
- Flatbed wagon between the front gate and the warehouse
Keygen Box and Disabling the Motion Sensors
Keygen Box Locations
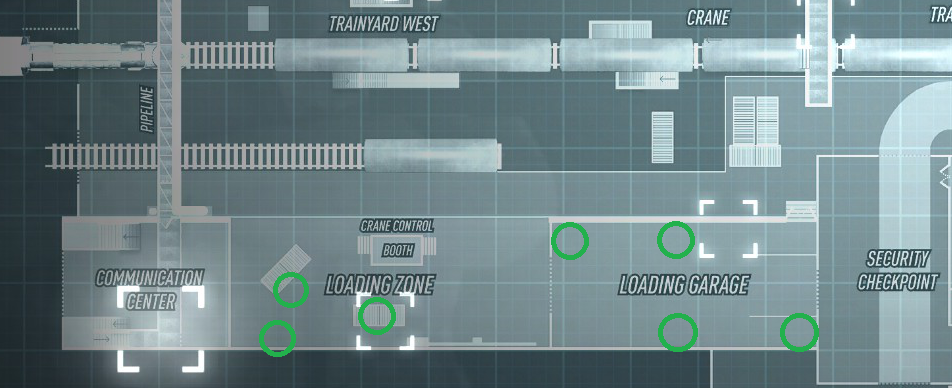
You can locate the keygen box once you’ve interacted with the motion sensor. This is often near the southwestern part of the map, either inside or just outside the loading garage.
Lockpick box locations:
- Middle of the south wall of the loading garage
- Near a dumpster by the southeast corner
- Northwest corner of the loading garage
- Near the forklift in the centre of the north wall
- Inside the container between the communication centre and loading garage
- Near the communication centre itself
Hacking the Keygen Box
To hack the keygen box:
- Lockpick the box to access it.
- Wait for the doors to open, then interact with it again to hack and reveal the code.
- Take note of the flashing lights, which correspond to the numbers on the motion sensor control’s keypad.
- Input the code into the motion sensor control box to turn off the sensors.
Opening the Train Wagons and Stealing the Loot
Once the motion sensors are disabled, you can now open the train wagons. The process involves using a blowtorch on the roof of the train cars. Be careful not to enter any wagons before turning off the sensors.
- Enter the Train Cars: Use the RFID pad next to the vault in the train car to identify the wire colour you need to cut.
- Cut the Correct Wire: Outside the train, each corner has a box containing coloured wires. If the colour matches the RFID pad’s indicator, cut it. Cutting the wrong wire will trigger an alarm.
- Loot the Vault: Once the wire is cut, the vault door will take a few seconds to open, revealing either plates or bagged money (depending on the objective).
- Bag and Secure Loot: After obtaining the loot, secure it at the white locomotive to the west of the warehouse.
Moving the Train and Escape
Using the PA System
To prepare for escape, you must first activate the PA system:
- Go to the communications centre in the southwestern corner.
- If the guard in the centre is blocking your way, you can use the ladder just north of the building to access the second floor, where you can jump over the railing and interact with the PA system.
- After the train’s departure is announced, the civilian near the loot train wanders off, allowing you to proceed with other objectives.
Prepping the Locomotive
To move the train, two tasks must be completed:
- Uncouple the Train Cars: Go to the coupler between the wagons and interact with it.
- Fuel the Locomotive: Interact with the fuel tank just north of the loot train, then go to the train and interact with the fuel cap to begin fueling. The process takes about 10 seconds.
Once the locomotive is fueled, you can interact with the engine start button to get the train moving.
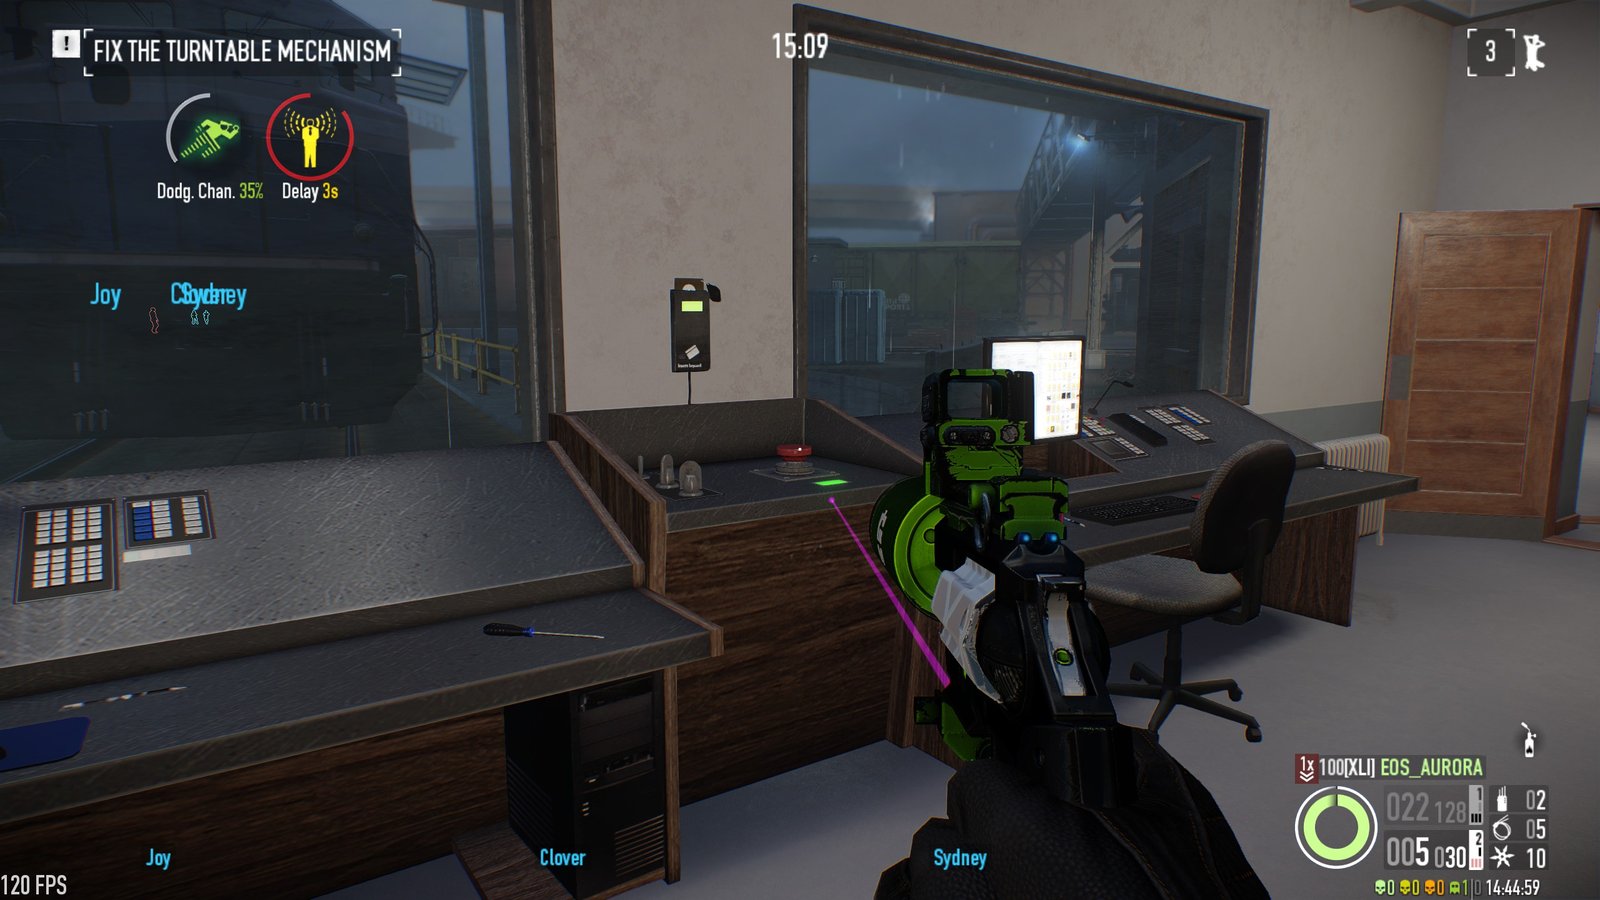
Using the Turntable
To finalize the escape, you must rotate the train on the turntable:
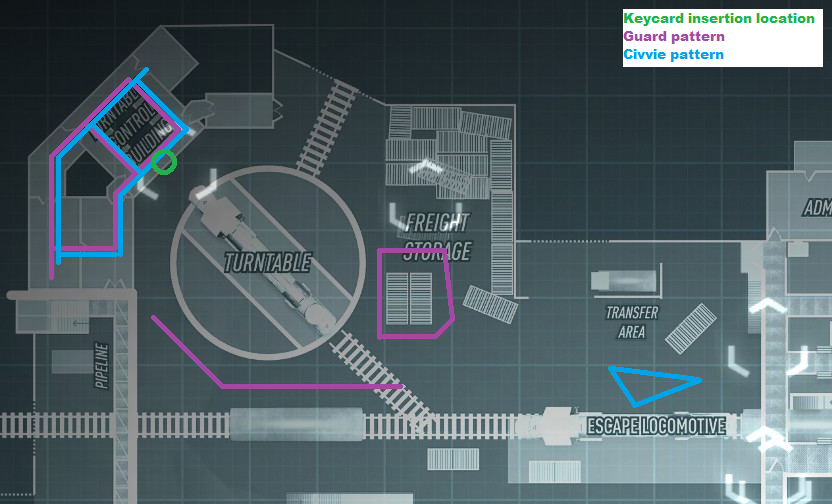
- Get the Turntable Control Keycard: The keycard is held by a civvie inside the turntable control building. He moves around, so timing is key. You can either tie him down or eliminate him for the keycard.
- Activate the Turntable: Once you have the keycard, go to the control panel and start the turntable.
- Repair the Cables (if needed): If the turntable cables short-circuit (guaranteed on DS), jump down into the pit and interact with the short-circuiting cables to repair them.
Once the train is in the correct position, you can escape. You can choose to leave immediately or continue looting.
Achievement-Specific Help
There are three non-difficulty and non-sequential achievements to unlock during Lost in Transit:
- Tabula Railroad: Complete the heist on OVERKILL difficulty or above in Loud while fulfilling these criteria:
- Every crew member wears a two-piece suit.
- Each crew member uses a Castigo .44 Revolver and a Mosconi 12G shotgun.
- No equipped skills are allowed (but you can still use a perk deck).
Tip: You can complete most stealth objectives and then go loud at the end if needed. A combination of careful planning and fast gunplay will help you achieve this.
- Billy the Kid: Get five headshot kills within 10 seconds using a revolver on OVERKILL difficulty or above. You can perform this achievement alongside Tabula Railroad by carefully lining up the shots. Wait for a group of enemies, and aim carefully to avoid misses.
- Victimless Crime: Complete the heist without raising the alarm or killing anyone. Dominating guards instead of killing them is key to this achievement. Avoid grabbing extra loot to reduce risk, and be mindful of civvies. Patience is essential.
Read More: Similar Games to Payday 2: The Heist